1. Getting Started with Raspberry Pi
Each project team will get the following items.
- Raspberry Pi 4 Ultimate Kit from CanaKit
- Smart Home Sensor Kit
Accessories:
- DisplayPort to HDMI Adaptor
Step 0: Open your Raspberry Pi (RPi) 4 Kit
For this tutorial, you will only need the RPi kit and the DisplayPort to HDMI Adaptor. In addition to that, you will need a monitor, a keyboard, and a mouse, which are available in our computer labs.
Since the kits will be used by future students, please make sure to keep your kit in good condition.
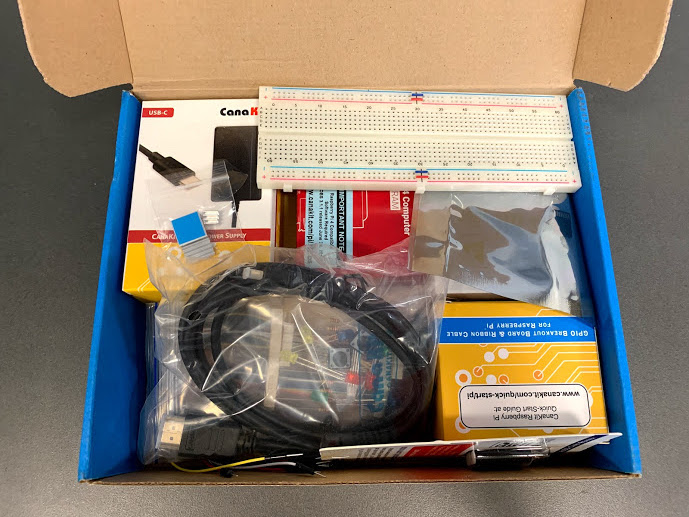
The RPi kit includes the following items. In particular, the kit comes with a Quick-Start Guide. Read pp. 2-4 of the Quick-Start Guide, which supplements this tutorial.
- Raspberry Pi 4 (4 GB RAM)
- CanaKit USB-C Power Supply
- Set of 3 Aluminum Heat Sinks
- CanaKit Quick-Start Guide
- SanDisk 32GB MicroSD w/NOOBS
- Premium Black Case
- USB Card Reader
- Micro HDMI Cable
Accessories:
- GPIO and Resistor Colors Quick Reference Cards
- GPIO Ribbon Cable
- Full-Size Large Breadboard
- 32 x M/M Jumper Wires
- RGB LED
- 2 x Red LEDs
- 2 x Green LEDs
- 2 x Yellow LEDs
- 2 x Blue LEDs
- 2 x Push Button Switches
- 10 x 220 Ohm Resistors
- 5 x 10K Ohm Resistors
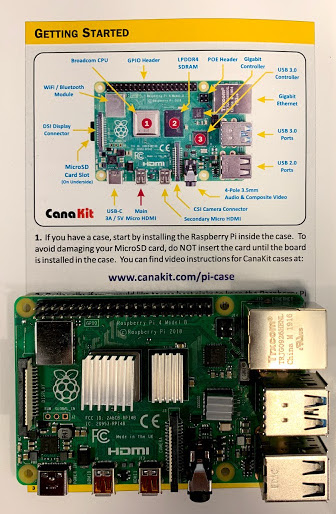
Step 1: Stick on Heat Sinks and Encase the RPi
- Firstly, stick the heat sinks onto the RPi following the instructions on p. 3 of the Quick-Start Guide.
- Fit the RPi in the case that comes with the kit.
Step 2: Insert the SD Card
- Insert the SD card directly into the RPi. The SD card that comes with the kit is already pre-loaded with a New Out of Box Software (NOOBS), which is an operating system (OS) installation manager for RPi’s. So, there is no need for you to do anything with the SD card.
Step 3: Connect your RPi
- Connect a monitor to the RPi. Use the micro HDMI cable that comes with the kit to connect the monitor to Port HDMI 0 on the RPi. The monitors in the computer lab use DisplayPort interface, so we additionally provide you with a DisplayPort to HDMI adaptor.
- Connect a mouse and a keyboard to the RPi.
- Finally, connect the power adaptor that comes with the kit.
Step 4: Install OS for your RPi
- The RPi should power up automatically, after you connect the RPi to the power adaptor.
- Install Raspbian OS and configure your RPi following the on-screen instructions.
- For WiFi connection, use CMU-DEVICE. You need to open the web browser to register the RPi using your CMU credential.
- Finally, restart the RPi following the on-screen instruction.
Step 5: Install Useful Packages
- Open the terminal.
- Type the following lines into the terminal. Do not type the “$” sign, which just denotes that you’re typing something in the command line.
$ sudo apt-get update $ sudo apt-get upgrade - Install necessary packages with
$ sudo apt-get install package_name.$ sudo apt-get install python-rpi.gpio - Install other packages, e.g. my favorite text editor:
$ sudo apt-get install vim
Congratulations! You have successfully set up your RPi.
(Optional) Step 6: Set Up Remote Access to RPi
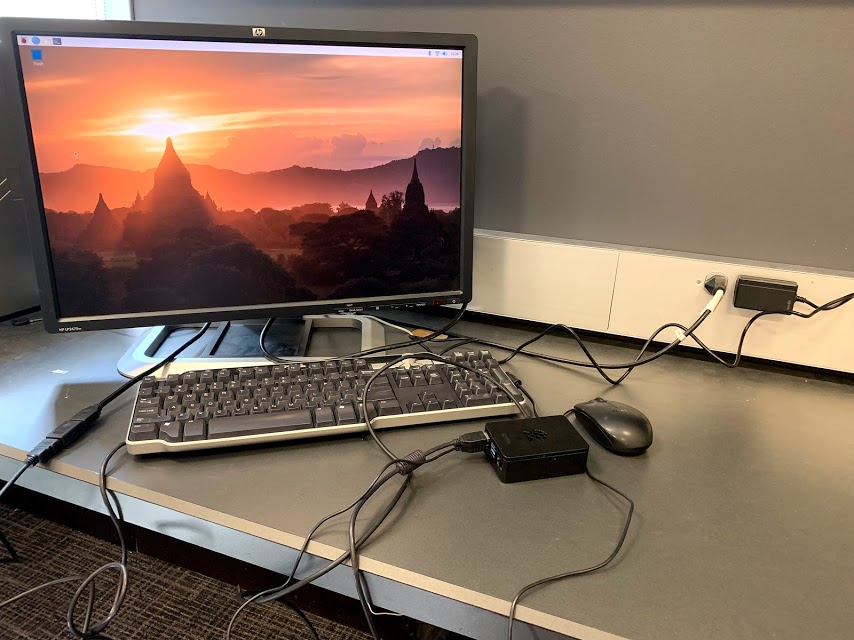
After you finish with Step 1-4, your desk would probably looks like this:
If you do not want the clutter and you are comfort with command line tools, you should set up remote access to your RPi following the instructions here. Having set up the remote access, you can do without the monitor, keyboard and mouse, and work on the RPi directly from your laptop.